Introduction: A Modern Upgrade for Your 1992 Corvette
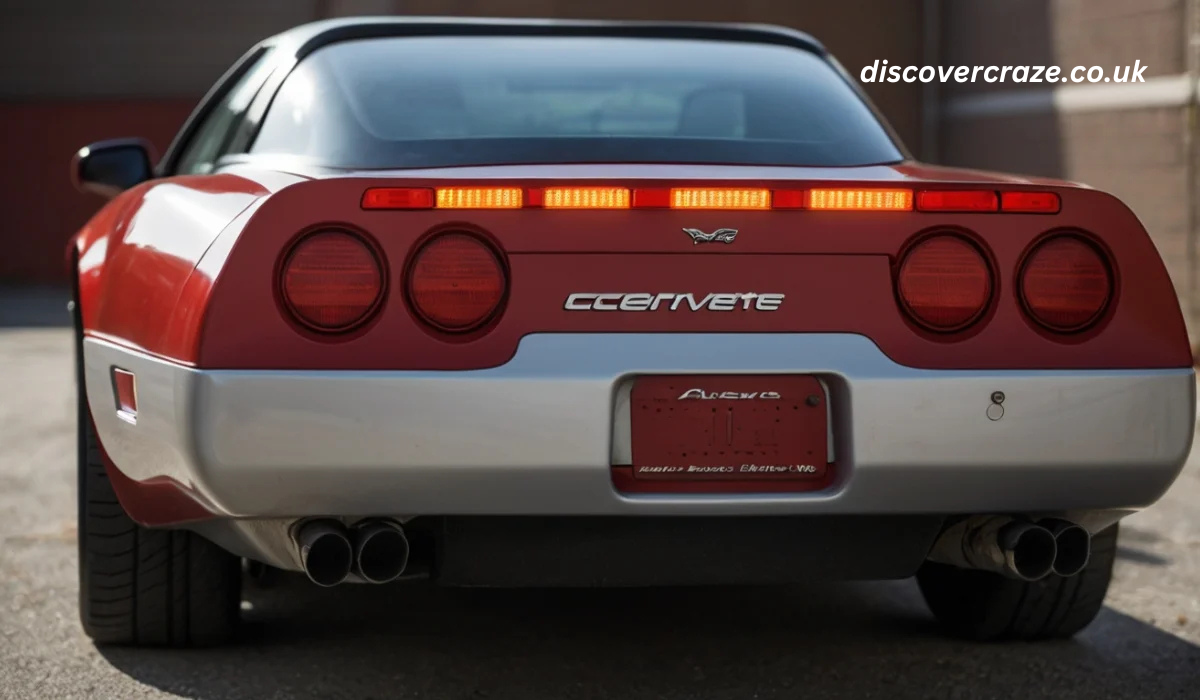
When it comes to upgrading a classic vehicle like the 1992 Corvette, one of the most common enhancements that owners look for is a lighting upgrade. Specifically, LED tail lights are becoming a go-to choice for their modern look, energy efficiency, and durability. The Corvette, being a beloved icon in the automotive world, deserves the best upgrades that maintain its performance and 1992 corvette remover tail lights for led load resistor aesthetic appeal. The installation of LED tail lights is not only about achieving a brighter and more efficient light source; it’s about enhancing your vehicle’s overall functionality.
However, this upgrade comes with its own set of challenges, primarily related to the 1992 corvette remover tail lights for led load 1992 corvette remover tail lights for led load resistor resistor electrical system. In many cases, Corvette owners will encounter issues like hyper-flashing, where the turn signals blink too quickly after switching to LEDs. The reason for this is that LED lights draw less current than traditional incandescent bulbs, causing the vehicle’s electrical system to incorrectly register that there is a malfunction. This is where LED load resistors come in, and it’s essential to understand how they work.
The 1992 Corvette remover tail lights for LED load resistor process is essential for those wanting to ensure that their Corvette’s tail lights work correctly with the new LED setup. In this post, we will dive deep into the installation process, troubleshooting common issues, and understanding the importance of proper installation to ensure the best outcome for your vehicle’s lighting.
Understanding the Basics of LED Tail Lights and Their Advantages
Before diving into the specifics of installing LED tail lights in your 1992 Corvette, it’s important to first understand what makes LED lights so desirable for modern vehicles.
LED (Light Emitting Diode) technology has revolutionized automotive lighting by offering 1992 corvette remover tail lights for led load resistor several benefits over traditional incandescent bulbs. For Corvette owners looking to modernize their vehicle, LED tail lights provide both practical and aesthetic advantages.
Energy Efficiency:
One of the main reasons to switch to LED tail lights is their significant energy efficiency compared to conventional incandescent bulbs. LED lights use far less power, meaning your Corvette’s electrical system can function more efficiently. This reduction in energy consumption also helps extend the life of your battery and alternator, which could save you money in the long run.
Brighter Light Output:
LED tail lights produce a brighter, clearer light compared to traditional bulbs. This not only enhances the overall visibility of your Corvette, ensuring other drivers can see your vehicle from a distance, but it also improves the safety of your driving experience. Bright LED lights help reduce the risk of accidents, particularly during night driving or inclement weather conditions.
Longer Lifespan:
LED lights have an impressive lifespan. While incandescent bulbs may need replacement every few years, LEDs can last tens of thousands of hours, making them a more cost-effective long-term solution. For a vehicle like the 1992 Corvette, this means fewer replacements and maintenance.
With these benefits in mind, the transition to LED tail lights becomes a no-brainer for owners looking to upgrade their Corvette, but it’s crucial to address certain electrical challenges, such as hyper-flashing, which we’ll tackle in the following sections.
Hyper-Flash: The Most Common Problem with LED Tail Lights

One of the most frustrating issues faced by Corvette owners when upgrading to LED tail lights is hyper-flashing. This occurs when the turn signal indicator blinks too rapidly, creating a noticeable and often irritating effect. To fully understand why hyper-flashing happens, let’s break down the issue.
When you switch to LED tail lights, you are replacing traditional incandescent bulbs with modern LED lights, which consume far less power. Incandescent bulbs draw a significant amount of current, which the vehicle’s electrical system is designed to recognize. When you switch to LEDs, their lower current draw confuses the system into thinking that one or more bulbs have gone out, triggering the rapid blinking of the turn signal. This is known as hyper-flashing.
This issue is not just about an aesthetic concern. Hyper-flashing could make it more difficult for other drivers to judge your turn signal, increasing the risk of accidents. That’s why it’s essential to address the problem head-on when installing LED tail lights in your 1992 Corvette.
Why LED Load Resistors Are Necessary for Your 1992 Corvette
In order to solve the hyper-flashing issue, the addition of LED load resistors becomes a necessity. These resistors are designed to simulate the resistance of a traditional incandescent bulb, tricking your Corvette’s electrical system into recognizing that everything is functioning as it should. The 1992 Corvette remover tail lights for LED load resistor procedure ensures that you won’t encounter the fast-blinking turn signal issue once the installation is complete.
LED load resistors work by essentially consuming the same amount of power as the original incandescent bulbs. They are wired into the system in parallel with the LED bulbs, allowing the electrical system to operate normally. By using load resistors, your Corvette will be able to maintain the same flash rate as it did when it had incandescent bulbs, avoiding hyper-flashing altogether.
Step-by-Step Installation of LED Tail Lights and Load Resistors
Now that you have a basic understanding of why LED load resistors are necessary, let’s walk through the entire process of installing your 1992 Corvette remover tail lights for LED load resistor setup. The following steps will guide you through the process, ensuring that you get the best results and avoid common pitfalls along the way.
Step 1: Remove the Old Tail Lights
The first step in any tail light replacement process is to remove the existing tail light assembly. Here’s how you can do it:
- Access the Tail Light Housing: Begin by opening the trunk of your Corvette and removing the panel or interior trim around the tail light housing. You may need to use a flathead screwdriver or socket wrench to remove the screws or bolts securing the trim.
- Disconnect the Wiring: Once the tail light housing is loose, disconnect the wiring harness from the back of the bulb assembly. Be sure to handle the wiring gently to avoid any damage.
- Remove the Incandescent Bulbs: The old incandescent bulbs should now be easy to remove. Simply twist them counterclockwise to remove them from their sockets.
Step 2: Install the LED Bulbs
Now that the old bulbs are removed, it’s time to install your new LED bulbs:
- Insert the LED Bulbs into the Housing: Insert the new LED bulbs into the same sockets where the old bulbs were. Make sure they’re seated securely.
- Reconnect the Wiring: Attach the wiring harness to the LED bulbs, ensuring a firm connection. It’s essential that the connections are secure to ensure proper lighting functionality.
Step 3: Add LED Load Resistors
To address the hyper-flashing issue, you’ll need to install LED load resistors:
- Connect the Resistor to the Turn Signal Wires: Use wire connectors to attach the load resistor to the turn signal wires in the tail light assembly. This ensures that the resistor functions correctly and mimics the resistance of an incandescent bulb.
- Secure the Resistor in Place: Use zip ties or adhesive heat shrink tubing to secure the resistor to a stable location, away from any moving parts.
Step 4: Reassemble the Tail Light Housing
Once the LED bulbs and resistors are installed, carefully reassemble the tail light housing, securing it with screws or bolts as necessary.
Step 5: Test the New Setup
Before closing everything up, turn on your Corvette and test the LED tail lights and turn signals. Make sure everything is working as expected, without any hyper-flashing or flickering issues.
Troubleshooting and Ensuring Proper Functioning

While the installation of 1992 Corvette remover tail lights for LED load resistor should be relatively straightforward, issues may still arise. Here are some common troubleshooting tips:
- If Hyper-Flash Persists: Double-check that the load resistors are installed correctly and that the connections are secure. In some cases, a higher-wattage resistor might be required to fully replicate the resistance of traditional incandescent bulbs.
- Flickering or Dim Lights: If you notice flickering or dimming of your LED tail lights, check the wiring connections and make sure they are all intact. Also, verify that the LED bulbs you are using are of high quality.
- Dashboard Warning Lights: If your dashboard shows warning lights or error messages after installing your LED tail lights, it may indicate a mismatch between the electrical system and the LED bulbs. In this case, using a CAN-bus decoder or specific resistors for your Corvette’s system might be necessary.
Conclusion: Achieving a Modern Look with Enhanced Performance
Upgrading your 1992 Corvette with LED tail lights is one of the best ways to enhance both the look and performance of your vehicle. However, the installation process requires attention to detail, particularly when it comes to avoiding common issues like hyper-flashing. By following the steps outlined in this guide for 1992 Corvette remover tail lights for LED load resistor, you can ensure a smooth, hassle-free installation that results in properly functioning LED tail lights.
Enjoy the modernized look, improved safety features, and energy efficiency that come with LED tail lights, and don’t forget to tackle any technical issues with the right load resistors. With the proper installation and maintenance, your Corvette will shine brighter than ever on the road.